How to Embroider French Knots on Your Knitting
French knots are a great solution for eyes, nostrils, or other bumpy textures on toys. If you are gifting your toy to a little one, under age 3, I recommend using French knots instead of safety eyes.

Step 1
Thread your tapestry needle through the toy where you would like to place the knot. When making parallel knots for eyes or nostrils, I like to use my needle to ensure the knots will be evenly placed.

Step 2
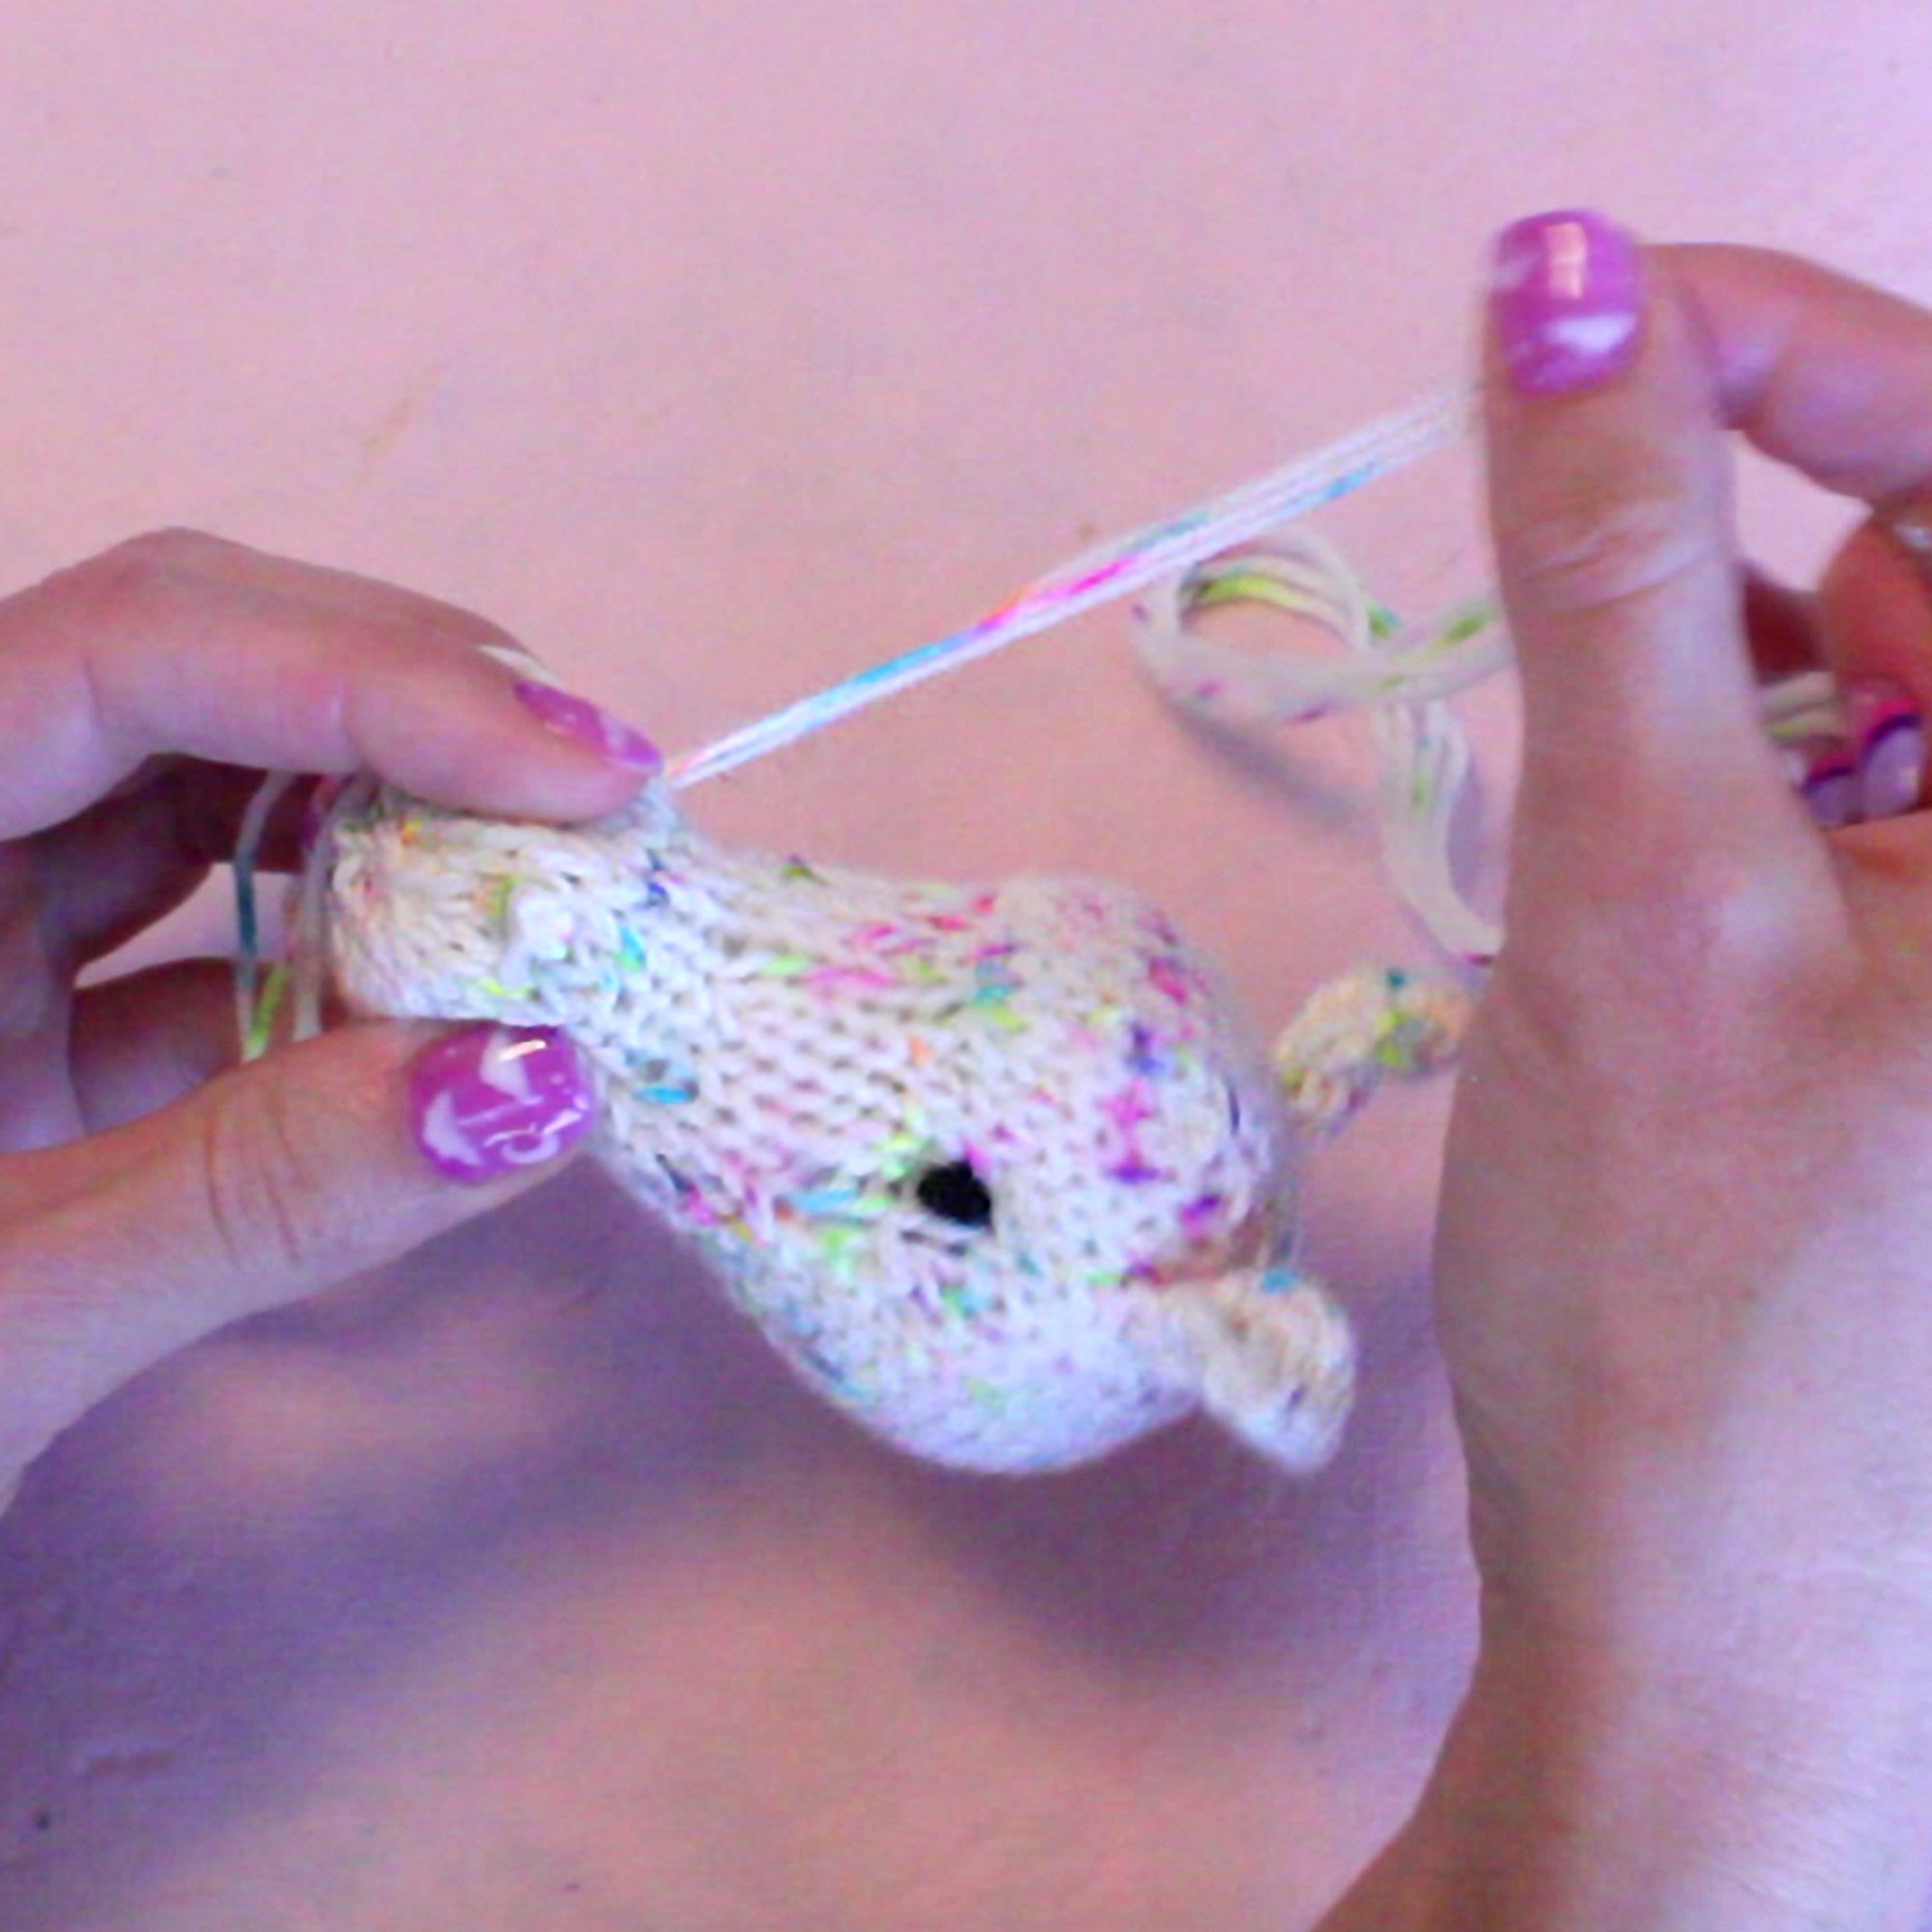
Wrap your yarn around the needle 3-4 times. The more wraps, the larger the knot. It is important to keep the yarn tightly wrapped as you move through the next steps.

Step 3
Insert the needle back into the toy and come out on the other side, in the same place as your tail. It is very important that you catch the leg of a stitch on your working side when you do this. If you do not, and instead go in and out of the same space, the knot will be pulled back into the body when you apply tension to it later.
Step 4
Carefully pull yarn back through body of the toy, keeping tension on the twists. Repeat this process to make a second knot on the other side.
When you finished, thread working yarn back through body so it comes out of the same hole as the tail. Pull gently on both ends to add tension and shape the body. When satisfied, tie a small square knot. Pull square knot into body using tapestry needle and then weave in ends.